

- Zoom account sign up
- If you already have a Zoom account, login to your account and proceed to step 2. If you do not have a Zoom account, proceed to step 1b.
- To create a free Zoom account, navigate to the Zoom website https://www.zoom.com/ and click the “Sign Up Free” button in the top navigation menu.

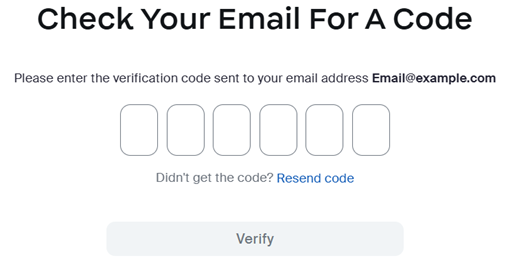
- Follow the prompts and enter the required personal information. You’ll need to verify your email address by entering the code that you receive to your inbox. Once verified, you can access your Zoom account and start the recording.
- Recording in Zoom
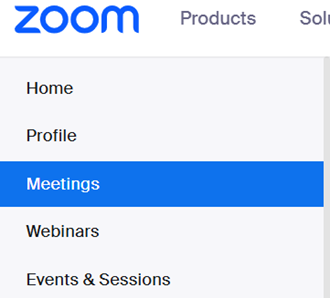
- Once you have logged in to your Zoom account, select the “Meetings” tab.
- Once on the Meetings page, select “Schedule a Meeting”

- Choose a relevant topic name that you will recognize and select the first available time. The rest of the fields can be ignored.
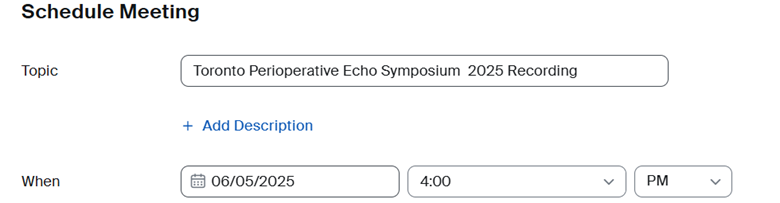
- Scroll down to the bottom and click “Save”

- Once your meeting has been saved, click on the “Start” buton. This will open the Zoom application.

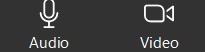
- In the window that appears, ensure that your audio and video are on and then click “Start” for the meeting to begin.

- Once in the meeting, if you would like to share a PowerPoint slide deck, click on the “Share” icon and select the PowerPoint file that you would like to share.

- Once your PowerPoint is shared, ensure that it is in presentation mode by clicking the “Slide show” tab in the navigation menu.

- If you would like to display any videos or images during your presentation, please ensure that the dimensions of the shared image or video take up at least 75% of the screen, to ensure that they are clearly visible to the audience.
- Similarly, if other content is being shared, your speaker window should take up no more than 15% of the screen, to ensure that other shared content is clearly visible to the audience. You can adjust your speaker view by clicking and dragging the divider between the speaker and shared content to the desired size.
- When choosing your video layout for the presentation, it is recommended to have the speaker in the top right corner if layered (video on top of slides), or on the right side of the slides if the video is separate from the slides. Your speaker layout can be toggled in the “View” menu, located in the top-right corner of the Zoom window during a meeting.
- Once you are ready to begin your presentation, click on the “Record” button in the zoom menu and select “Record to this computer”. If you do not see the “Record” button in the menu, you may need to click on the “More” button to access it.

- You should now see “Recording” at the top of your screen. This means that it is successfully recording.

- You can now start your presentation.
- Once you are finished presenting, click on the “End” icon and select “End meeting for all” to stop the recording.

- A prompt will appear indicating that your recording is being converted. Once it is converted, a window will appear where you can choose a folder where you want to save the recording. Select a location that you will remember and save the recording file. Please rename the file to include your surname, so that we can easily identify it.

- Once you have logged in to your Zoom account, select the “Meetings” tab.
- You may also choose to record your presentation in PowerPoint. To record your presentation in PowerPoint, open the PowerPoint program and select the “Record” tab in the top right of the PowerPoint screen.

- Once you are in the Recording screen, there are several options you can use when you record a presentation. You can turn your camera and microphone on or off by selecting the icons at the top.

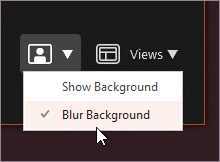
- In the Select the camera mode menu, you can select Show Background or Blur Background.
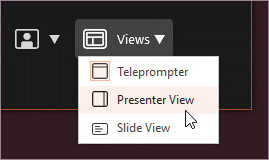
- You can also change the layout in the Views menu to switch between Teleprompter, Presenter View, or Slide View.
- When you’re ready to begin, select Start recording and a countdown will begin. Once the countdown has concluded, you may start speaking.

- You can use the onscreen laser, colored pens, or highlighters in the tray below markup slides, and it’ll record as well.

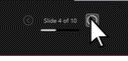
- To record narration for a specific slide, use the previous or next arrows. Note: Narration won’t record during slide transitions so let those play first before you start speaking.
- Pause the recording as needed or select Stop if you’re done. To review the video, select the Play button.

- When you’re done recording, select Export > Export Video to save it to a desired location. Please name the file to include your surname, so that we can easily identify it.

- After you successfully export the video, you can view the video by selecting View and share video.
- Uploading your presentation to Dropbox
- Once you have successfully saved the presentation to your computer. Navigate to the folder where it is saved and make a copy of it. Then open the following Dropbox link and upload your file: https://www.dropbox.com/request/qmv6K0Iu6qK7ya6ES3z4
- Optional* If you would like to have any polls displayed during your presentation, please create a text document that contains all of the poll questions and answers that you would like displayed, as well as the corresponding slide number in your presentation, during which they are to be displayed. Upload this file to the folder as well.